To continue with my saga of creating the perfect home studio, we come to the final piece of the puzzle which happens to be the stuff of legend…acoustic treatment. Yes, I’ll admit, in the beginning of all of this I was looking at the big box holding all this treatment and thinking to myself, “Did I just get suckered outta my hard-earned money? Will I even hear a difference?” I’ll report the final verdict later.
First, let me recap why I decided to throw down some cash and sweat a little to put this stuff up. Upon doing voice over work and just general acoustic recording, I began to notice that when I processed my audio (ie: compressor, limiter, etc.) I had a little problem with what they call echo-flutter. The mic was picking up my voice, however… it was also picking up the echo of my voice bouncing off the walls around me. As I stated, this was most notable once I applied compression or the like to the audio. So, I ended up spending enormous amounts of time getting REAL surgical with my audio edits to help alleviate the issue. But, to no avail.
I’ve heard of acoustic treatment and what it could do for a room, however it runs in my nature to be skeptical about everything… even when I have nothing to lose. But, I had lost my patience and decided to give it a whirl. I embarked on the good-ship internet, located what treatment would be good for my room and began my research as to how to put this stuff up. Well, low and behold, there weren’t that many blogs or articles describing exactly HOW to put these things up. There were plenty talking about how you should include these in your studio, just nothing telling me exactly how to actually do it. So, I realized it was up to me to get a little creative and see what I could come up with.
There were a few off the cuff remarks on how some people did it such as gluing the treatment to particle board or gluing it to ceiling tile and then screwing it onto the wall or ceiling. The one thing I realized, however, is being that you are putting several pieces of treatment together to create the bass trap or what have you, it can eventually add up in weight. Coupled with 2′ X 2′ particle board or ceiling tile that weight continues to go up, which means now you have to anchor these suckers into your wall and quite frankly I was beginning to see that I would have to actually work to get these up. I don’t like work.
I just painted my room and fixed all the anchor holes that were left by the prior owner, so the idea of adding more holes into the wall didn’t appeal to me. I wanted to use as few screws to hold these up as possible, which meant I needed to lessen the weight. Also, I wanted to keep the cost down in regards to the supplies needed to get these up. I just spent some money on the paint supplies and not to mention the treatment… I was done spending money. So, I had three rules I wanted to adhere to: Cheap, Minimal Holes, Light Weight.
Here’s how I accomplished it…
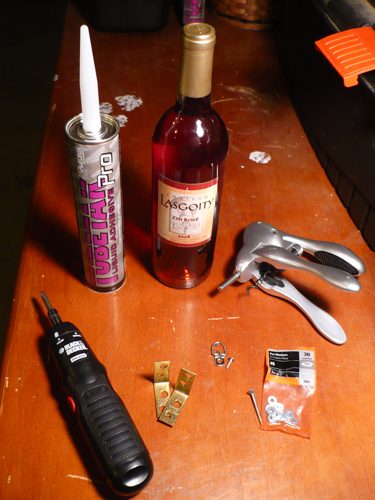
Step 1: The Tools
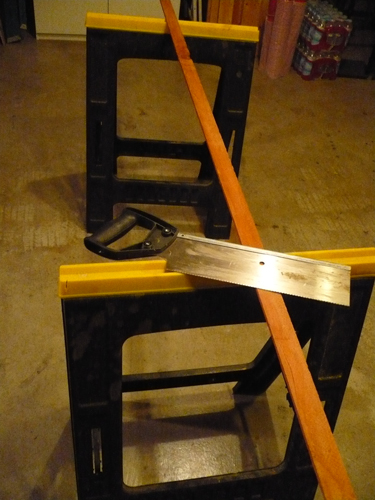
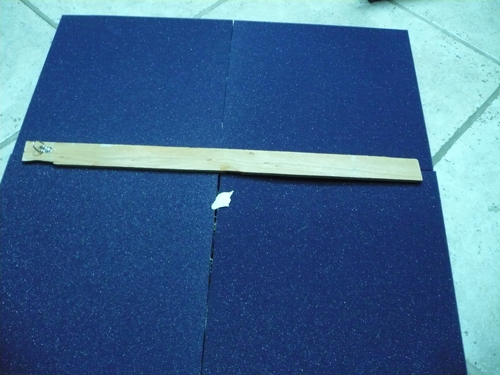
Step 2: Cut The Wood For The Frames
Step 3: Build The Frames

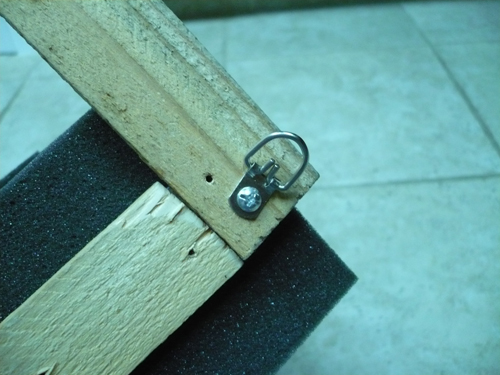
Step 4: Screw On The Hangers
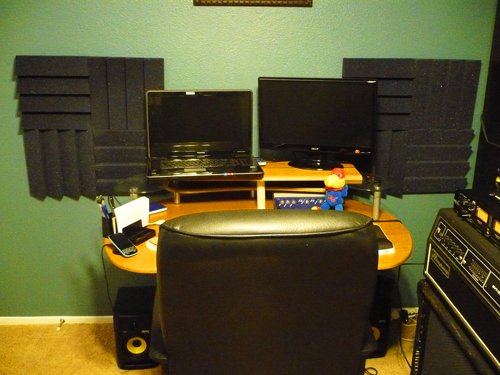
Step 5: Hang It
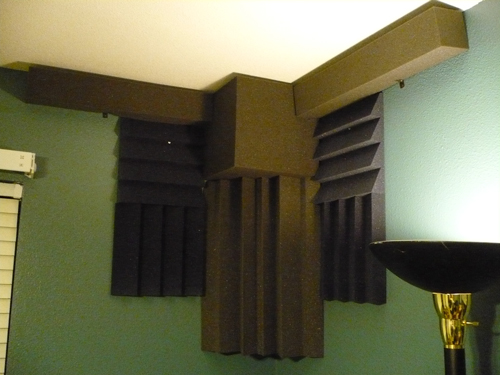

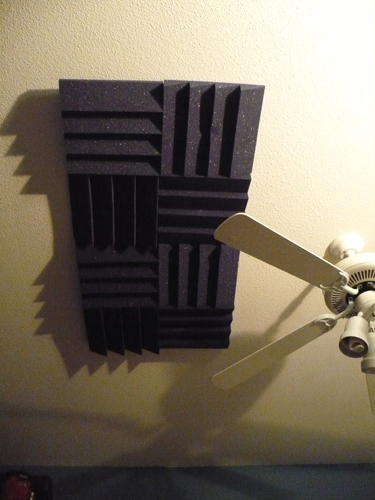
Step 6: Make Your Wall Panels
Step 7: Hang The Wall Panels
Step 9: Screw The Rest Where Needed
Side notes:
The Tube Tak takes a while to dry when using it to glue the treatment to wood. I was surprised by this. I ended up letting it sit all night and by next day it was stuck good. Also, for extra support, glue the treatment to each other as well as the frames when constructing your bass traps and wall panels.
Be sure to use washers when screwing the panels directly into the walls. The screw has a tendency to disappear into the hole in the treatment and not secure the treatment to the wall.
In Part 3, I will be posting a video of the final product with some before and after samples. My room sounds great and the flutter echo is greatly reduced. Will it compete with Capital Records’ Studios? Um.. no. But, it improved my home studio enormously and it didn’t cost an arm and a leg. I bought my treatment either on sale or from a lesser known company and I’m happy with the results.
I hope this helps someone out there looking to do the same with their home studio. If you have any questions on anything I didn’t cover, just leave me a comment. I might just have an answer.
Till next time…
David (CaliDingo)